Titrator Learning Center

Reproducible, rapid potentiometric analysis

Titrator Learning Center


Getting started with your Orion Star T900 Automated Titrator is simple and easy. Setup can be completed in a matter of minutes and before you know it you will be running daily titration tests, maintaining your titrator and reviewing your results.

The below options will help you navigate through the various tutorial collections. Let’s get started with setting up your titrator. If you’ve already completed this, you can find our recommendations for daily use and maintenance in the sections below.

If your Automated Titrator requires calibration or other services, please visit the Orion Instrument Service and Repair Depot.


First-time Setup


Daily Testing Workflow


Maintenance,
methods & data

Set up your Orion Star T900 Auto Titrator be done in six easy steps. Below, you’ll find instructional videos and written support for each part of the titrator set up.

Step 1: Assemble your titrator

Watch a step-by-step tutorial for assembling your Orion Star T900 Automated Titrator. You may also assemble your titrator by following the Quick Start Guide.

Video Player is loading.
Current Time 0:00
Duration 3:11
Loaded: 5.14%
Stream Type LIVE
Remaining Time 3:11
 
1x
    • Chapters
    • descriptions off, selected
    • captions off, selected
    • en (Main), selected

    Step 2: Enter titrator settings

    The first time the titrator is powered on, the Instrument Setup Wizard will be shown. Press the “Start Setup” button to initiate. The titrator will show general settings including language, time, date, temperature units and instrument name.

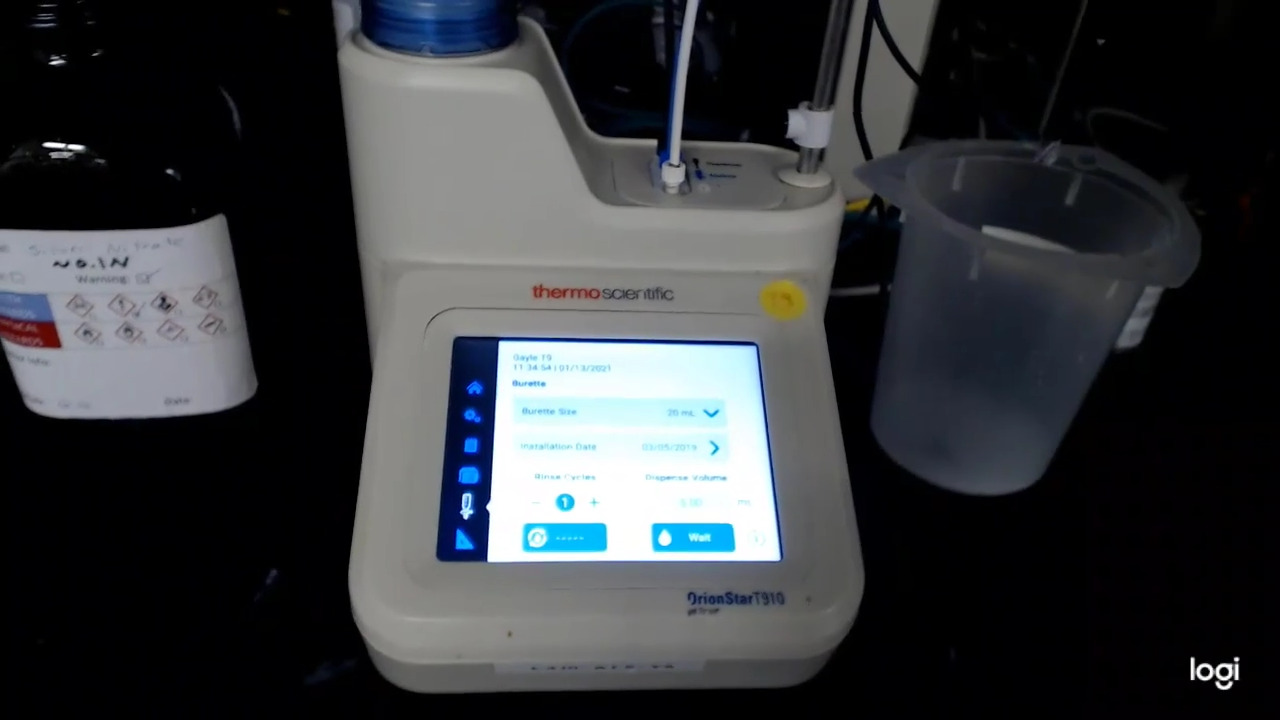
    Learn to set the language, date and time and burette details on Orion Star T900 Automated Titrator with this step-by-step tutorial.

    Video Player is loading.
    Current Time 0:00
    Duration 1:40
    Loaded: 9.85%
    Stream Type LIVE
    Remaining Time 1:40
     
    1x
      • Chapters
      • descriptions off, selected
      • captions off, selected
      • en (Main), selected

      Step 3: Program the method

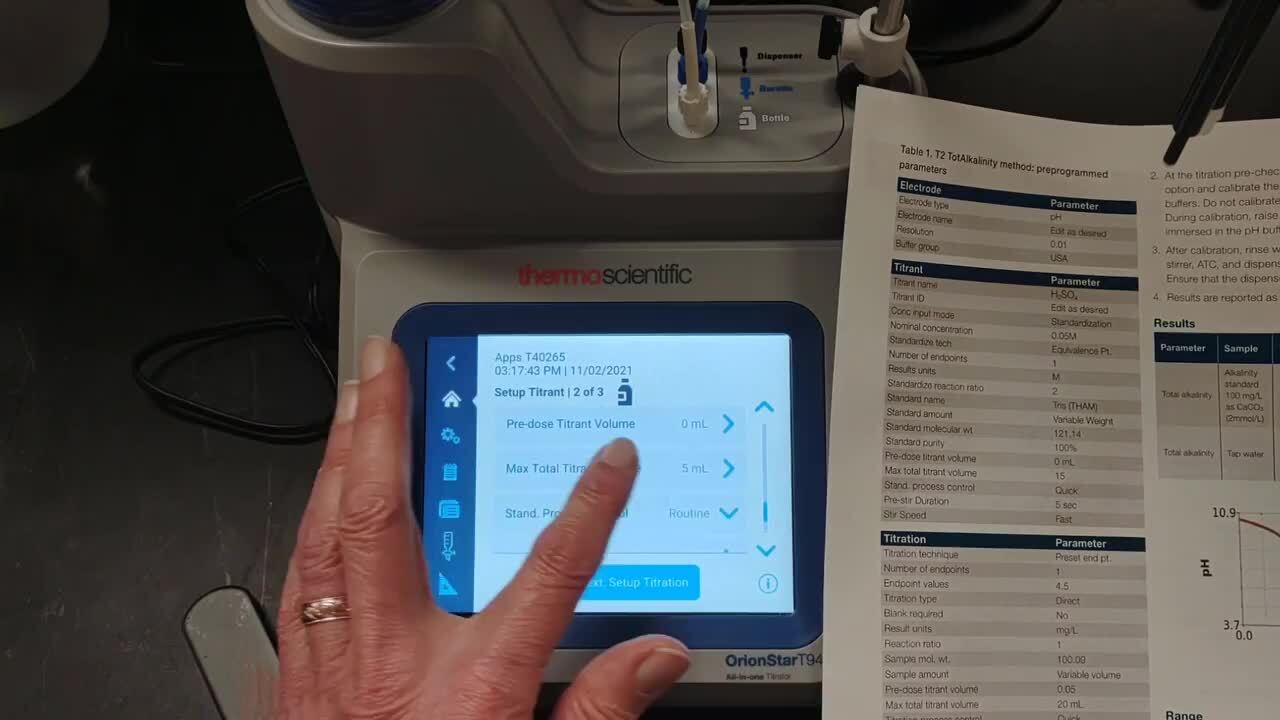
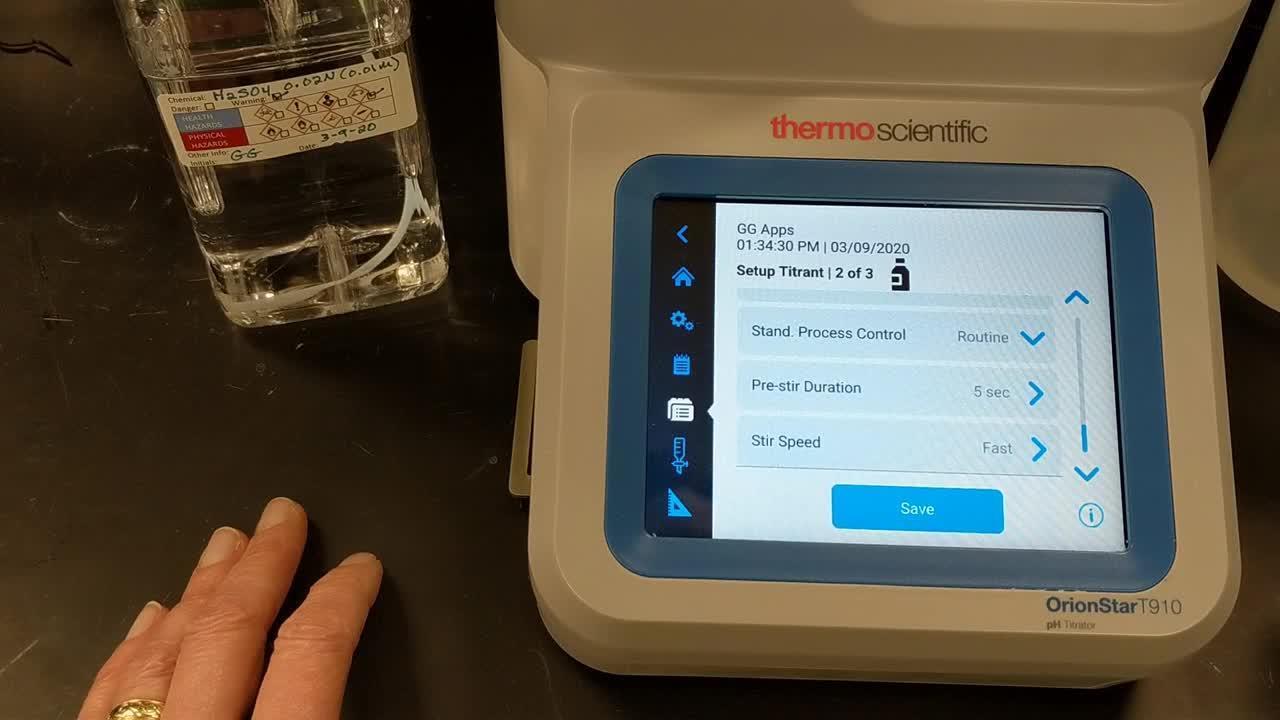
      Follow along as we demonstrate the simple steps to program a method using an application note. In this video, we are using the total alkalinity in water as our example.

      Video Player is loading.
      Current Time 0:00
      Duration 4:13
      Loaded: 3.92%
      Stream Type LIVE
      Remaining Time 4:13
       
      1x
        • Chapters
        • descriptions off, selected
        • captions off, selected
        • en (Main), selected

        Step 4: View the method

        Follow along as we see an example of how to review the method program.

        Video Player is loading.
        Current Time 0:00
        Duration 3:30
        Loaded: 4.69%
        Stream Type LIVE
        Remaining Time 3:30
         
        1x
          • Chapters
          • descriptions off, selected
          • captions off, selected
          • en (Main), selected

          Step 5: Fill the burette

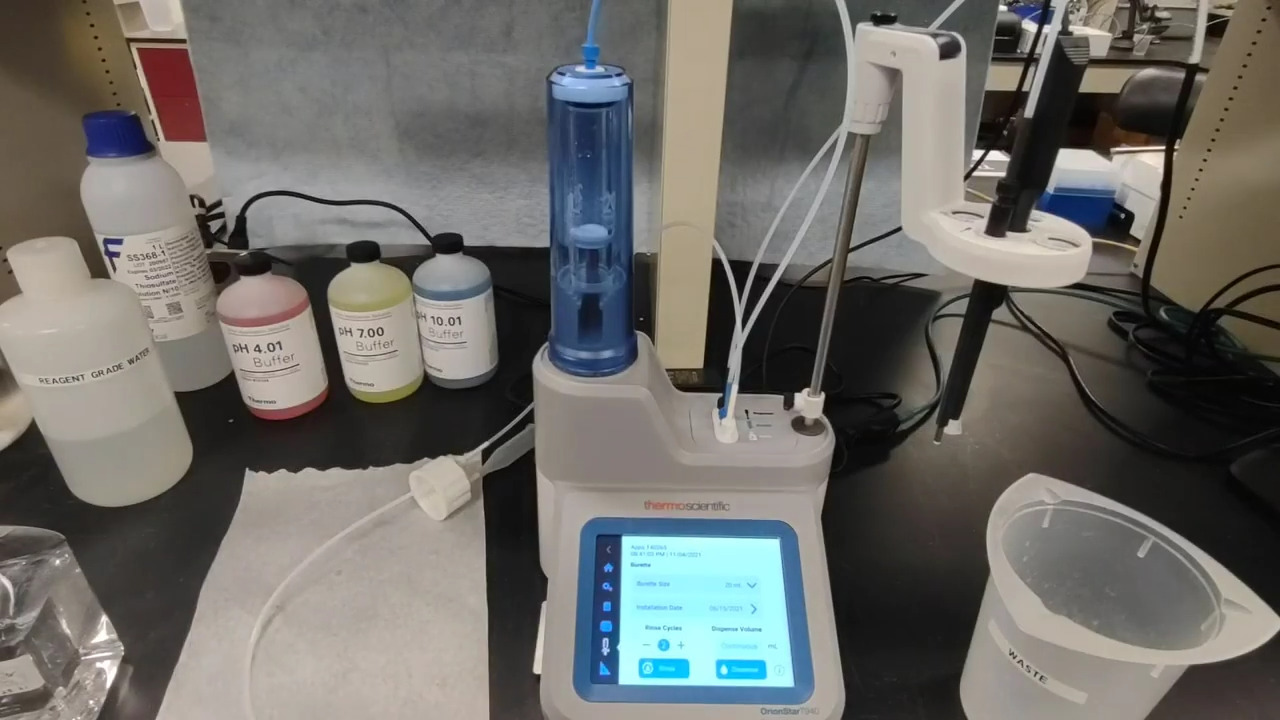
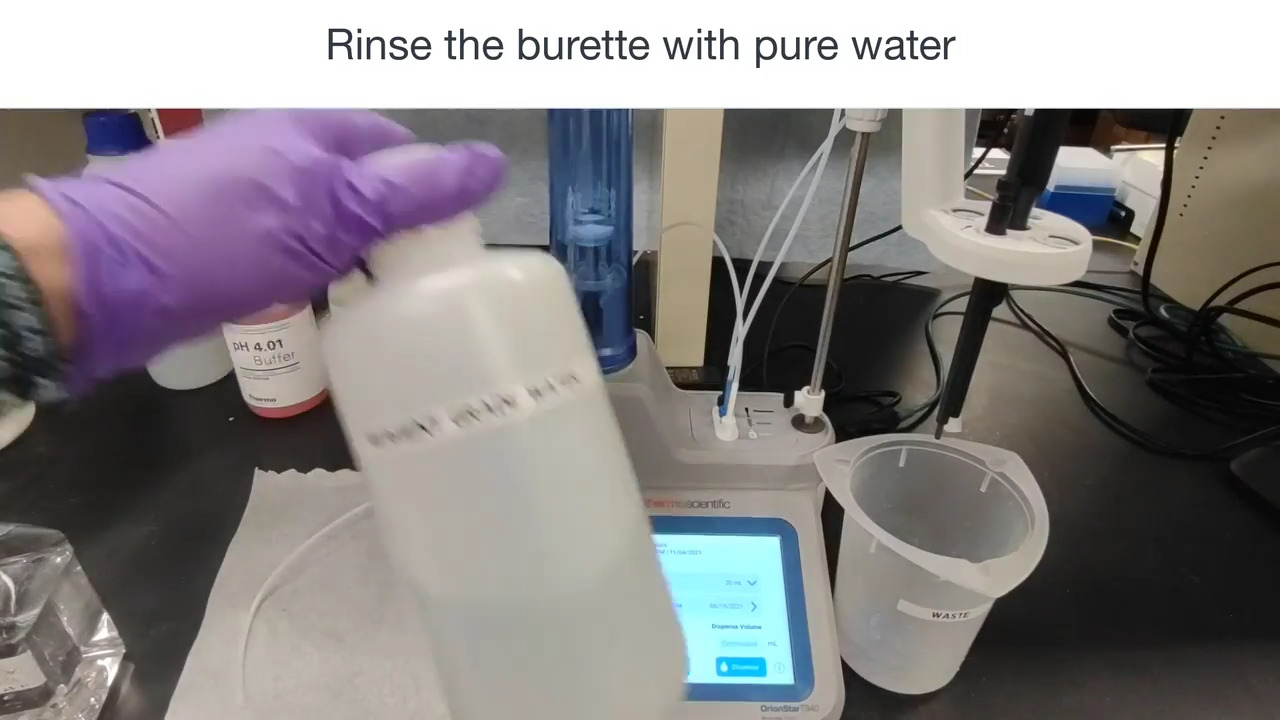
          Fill your burette easily after watching this quick demonstration.

          Video Player is loading.
          Current Time 0:00
          Duration 1:30
          Loaded: 10.96%
          Stream Type LIVE
          Remaining Time 1:30
           
          1x
            • Chapters
            • descriptions off, selected
            • captions off, selected
            • en (Main), selected
            If preferred, read instructions here
            1. Select and prepare the desired titrant.
              1. Use the included GL38 bottle cap and plastic bottle, or the preferred titrant bottle and appropriate bottle cap.
              2. Ensure the white bottle tubing is secured properly from the bottle cap to the labeled titrator valve input.
            2. Place a waste beaker under the dispenser probe.
            3. From the Home screen, press the “Burette” icon to access the Burette Setup and Maintenance screen.
            4. Perform 3-5 rinse cycles to flush the burette, tubing and dispenser probe with titrant before performing a titrant standardization or titration.
              1. In the “Rinse Cycles” section, press the – or + keys to adjust the number of rinse cycles and then press the “Rinse” button to start.
              2. The titrator will pull the titrant from the titrant bottle into the burette and then push the titrant from the burette into the dispenser probe and out into the waste beaker.

            Note: While the rinse cycles are running, the “Rinse” button will update to show “Stop”. Press the “Stop” button at any time to abort the rinse cycles.

            Step 6: Prepare the electrode

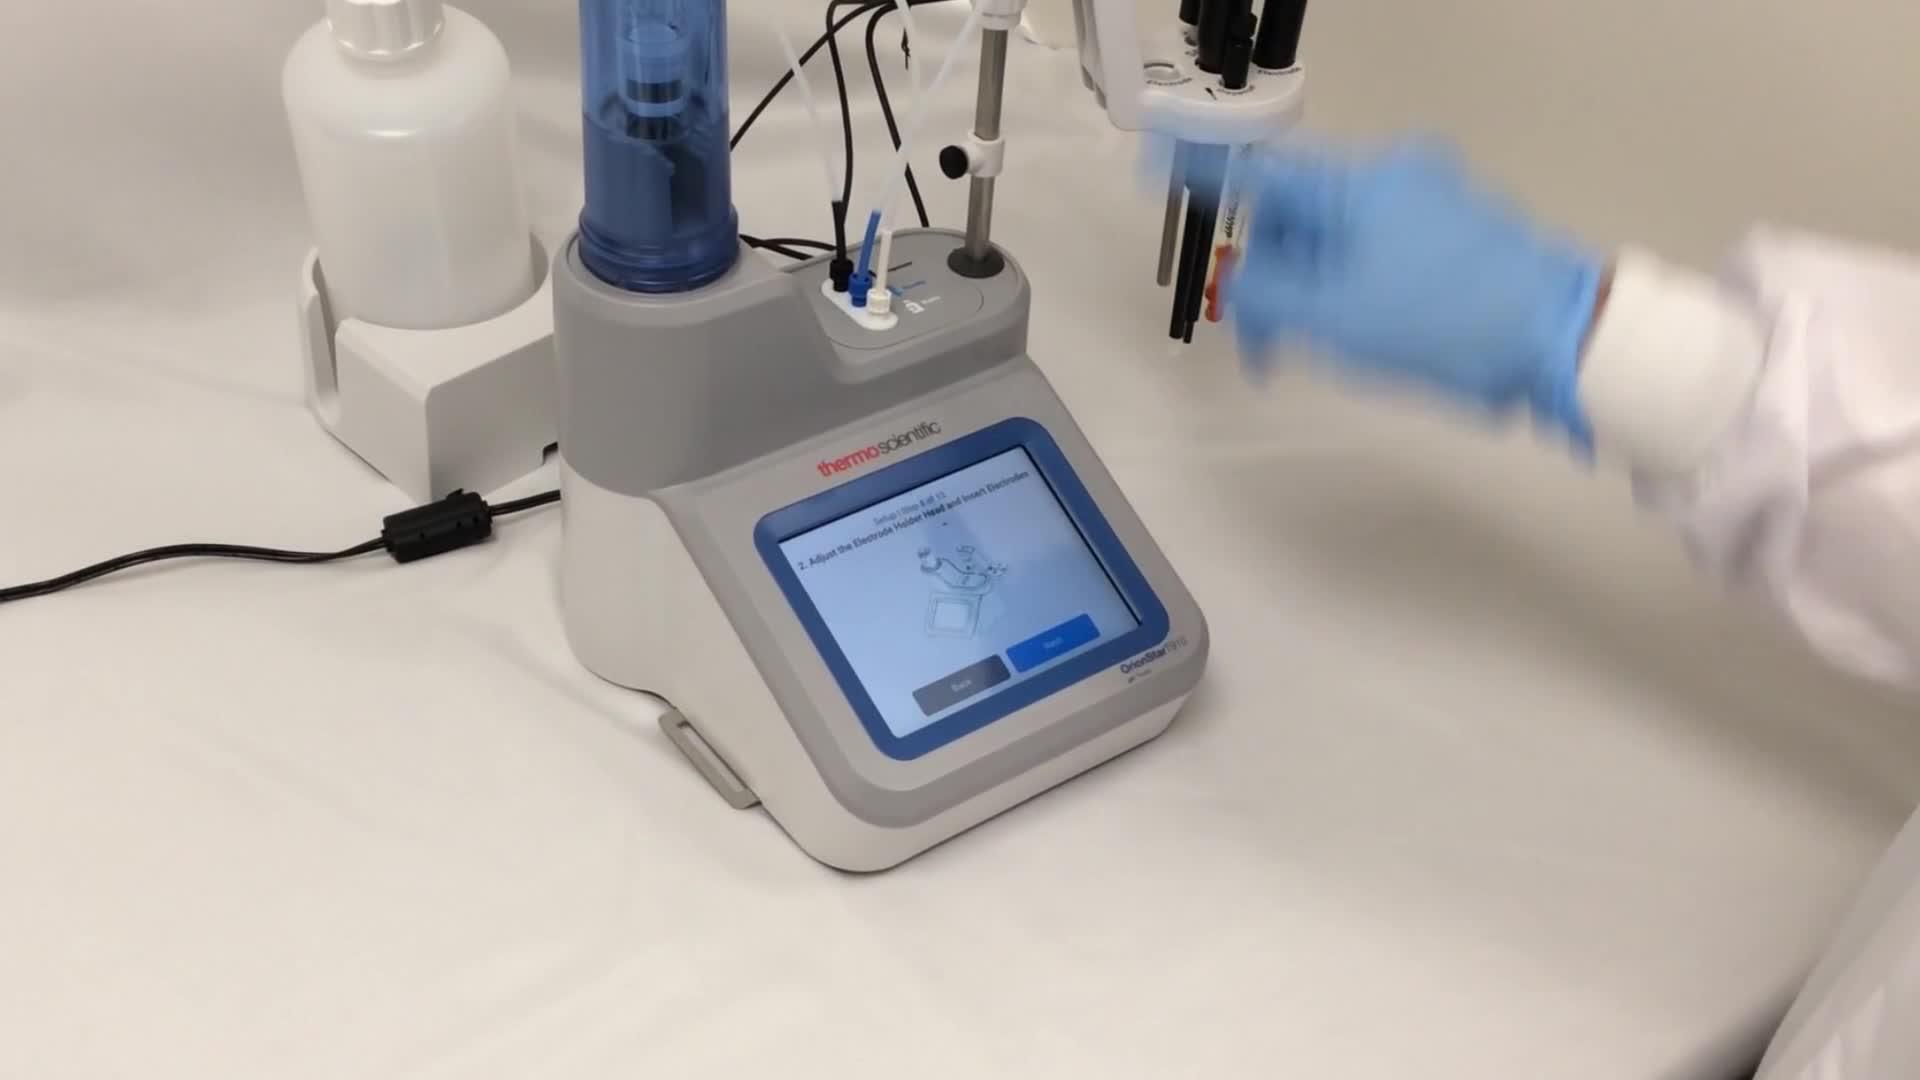
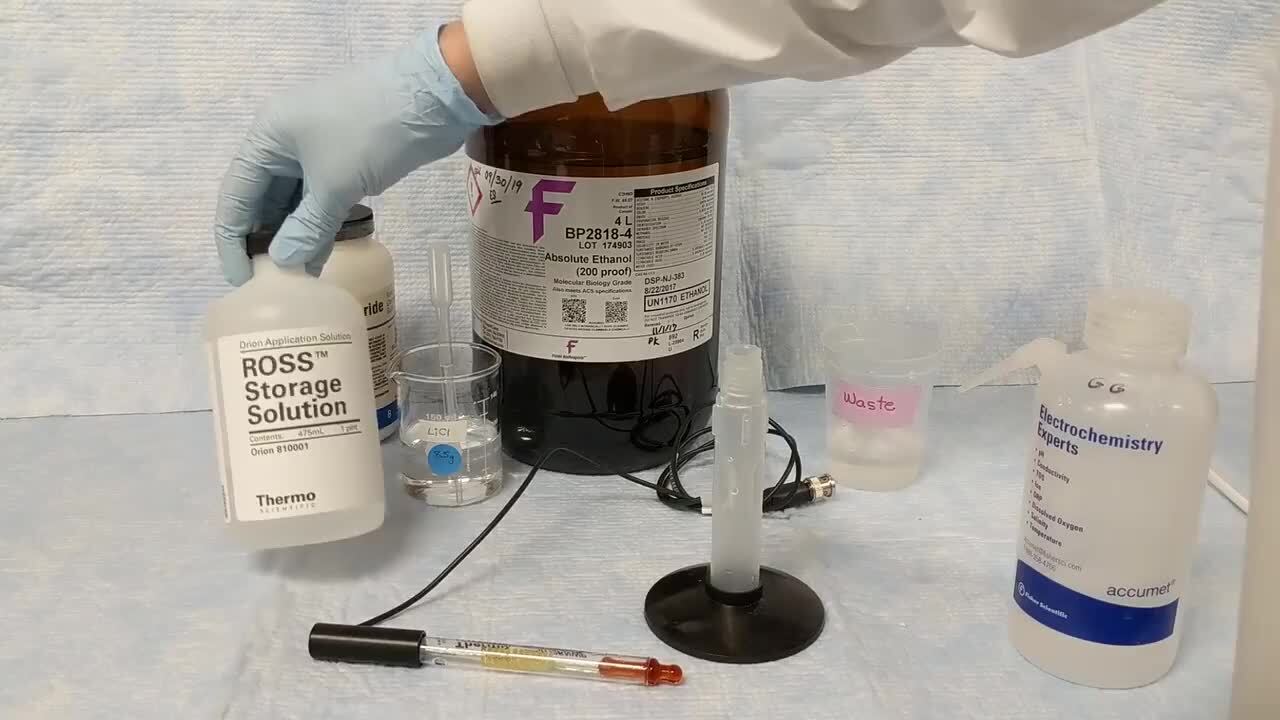
            Preparation of your electrode is simple once you’ve reviewed the step-by-step instructions in your electrode user guide. Watch the below video to see an example using an Orion ROSS Sure-Flow pH Electrode (Cat. No. 8172BNWP) or use the below chart to find the preparation methods for our most commonly used electrodes.

            Video Player is loading.
            Current Time 0:00
            Duration 2:14
            Loaded: 7.39%
            Stream Type LIVE
            Remaining Time 2:14
             
            1x
              • Chapters
              • descriptions off, selected
              • captions off, selected
              • en (Main), selected

              For salt titration electrode preparation, watch this video starting at 2:37.

              Video Player is loading.
              Current Time 0:00
              Duration 4:53
              Loaded: 3.37%
              Stream Type LIVE
              Remaining Time 4:53
               
              1x
                • Chapters
                • descriptions off, selected
                • captions off, selected
                • en (Main), selected

                For TAN or TBN titration electrode prep, watch this video.

                Video Player is loading.
                Current Time 0:00
                Duration 2:51
                Loaded: 5.78%
                Stream Type LIVE
                Remaining Time 2:51
                 
                1x
                  • Chapters
                  • descriptions off, selected
                  • captions off, selected
                  • en (Main), selected
                  If preferred, read instructions here

                  All other methods can be found in the manual that corresponds with the electrode model – available online and included in the electrode box.

                  Regular use of your Orion Star T900 Series Titrator will involve using a variety of titrator menu options. Below, you’ll find a common workflow series to support daily usage of the titrator with step-by-step instructions, practical examples, and clear demonstrations of the titrator menu options.

                  Step 1: Titrant & bubbles

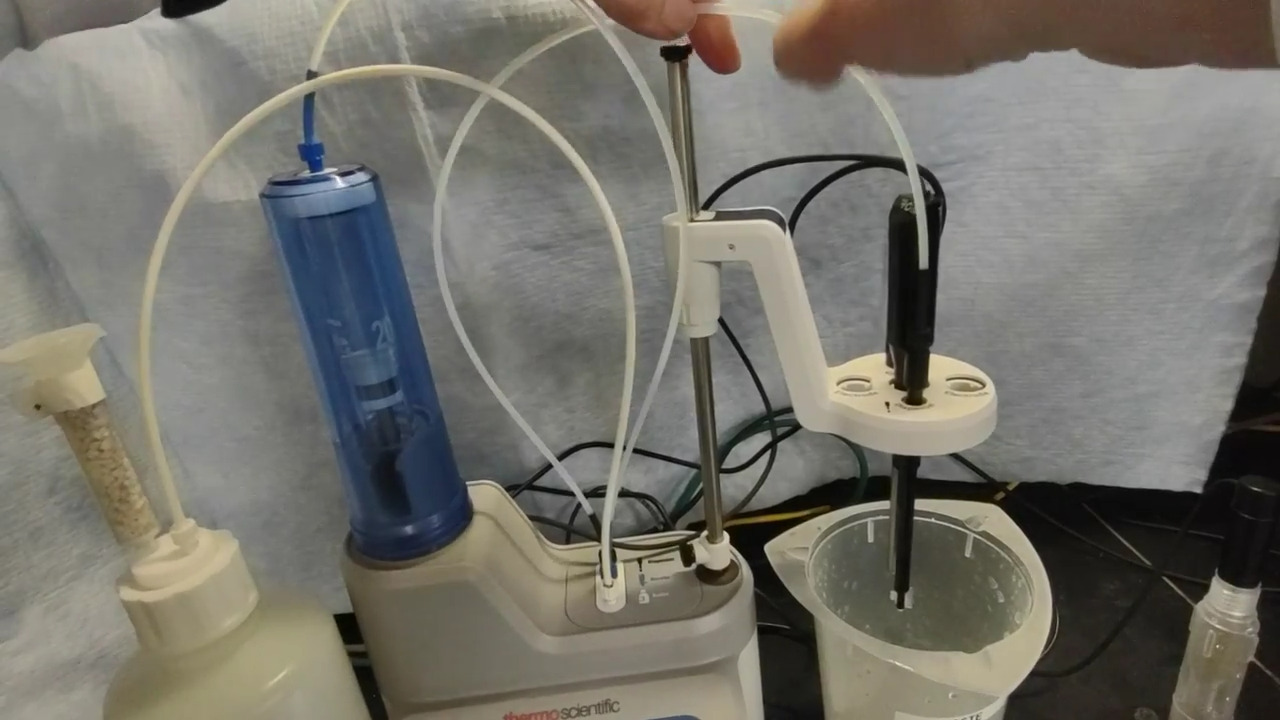
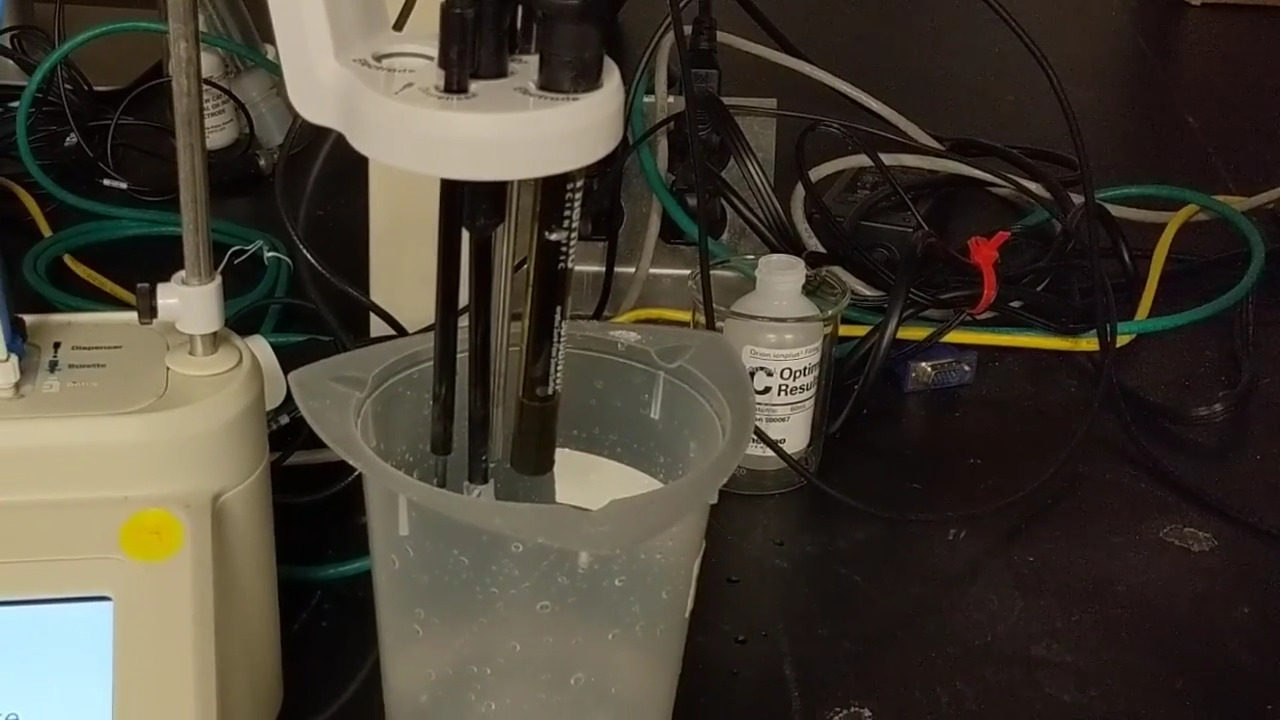
                  See an example of how to prepare your titrator for the day’s titrations – check the titrant, clear the dispenser, and remove bubbles from the lines.

                  Video Player is loading.
                  Current Time 0:00
                  Duration 2:41
                  Loaded: 6.16%
                  Stream Type LIVE
                  Remaining Time 2:41
                   
                  1x
                    • Chapters
                    • descriptions off, selected
                    • captions off, selected
                    • en (Main), selected
                    If preferred, review written guidance for removing titrant & bubbles
                    Daily preparation for the titrator
                    • Ensure there is sufficient titrant in the bottle for the day’s titrations.
                    • Each day before the first titration, dispense a small amount of titrant (e.g. 5 mL) to clear the dispenser and expel air bubbles. 
                    • If bubbles are still visible in the titrator tubing, tap the tubing and dispense titrant until bubbles have been expelled.

                    Note: Place a waste beaker under the dispenser probe before starting the rinse cycles!

                    • Dispense Volume: Tap the field below Dispense Volume to select "Continuous" or "Preset Value"
                      • For the Continuous setting, press and hold the "Dispense" button to manually flush a desired amount of solution through the burette
                      • For the Preset Value setting, enter a volume of solution and then press the "Dispense" button to dispense the set volume through the burette

                    Step 2: Electrode prep

                    Review the video at the right to see the steps to prepare an Orion ROSS Sure-Flow pH Electrode for use in the titrator.

                    For salt titration electrode preparation, watch this video starting at 2:37.

                    For TAN or TBN titration electrode prep, watch this video.

                    Video Player is loading.
                    Current Time 0:00
                    Duration 2:14
                    Loaded: 7.39%
                    Stream Type LIVE
                    Remaining Time 2:14
                     
                    1x
                      • Chapters
                      • descriptions off, selected
                      • captions off, selected
                      • en (Main), selected
                      If preferred, review written guidance for electrode preparation
                      Daily electrode preparation
                      • Add electrode fill solution to the bottom of the fill hole and leave the fill hole open during measurement.
                      • Rinse electrode well with RGW between titration cycles.
                      Weekly electrode care
                      • Drain and replace the fill solution of the electrode. 
                      • Change the storage solution in the electrode storage bottle.

                      Step 3: Select method

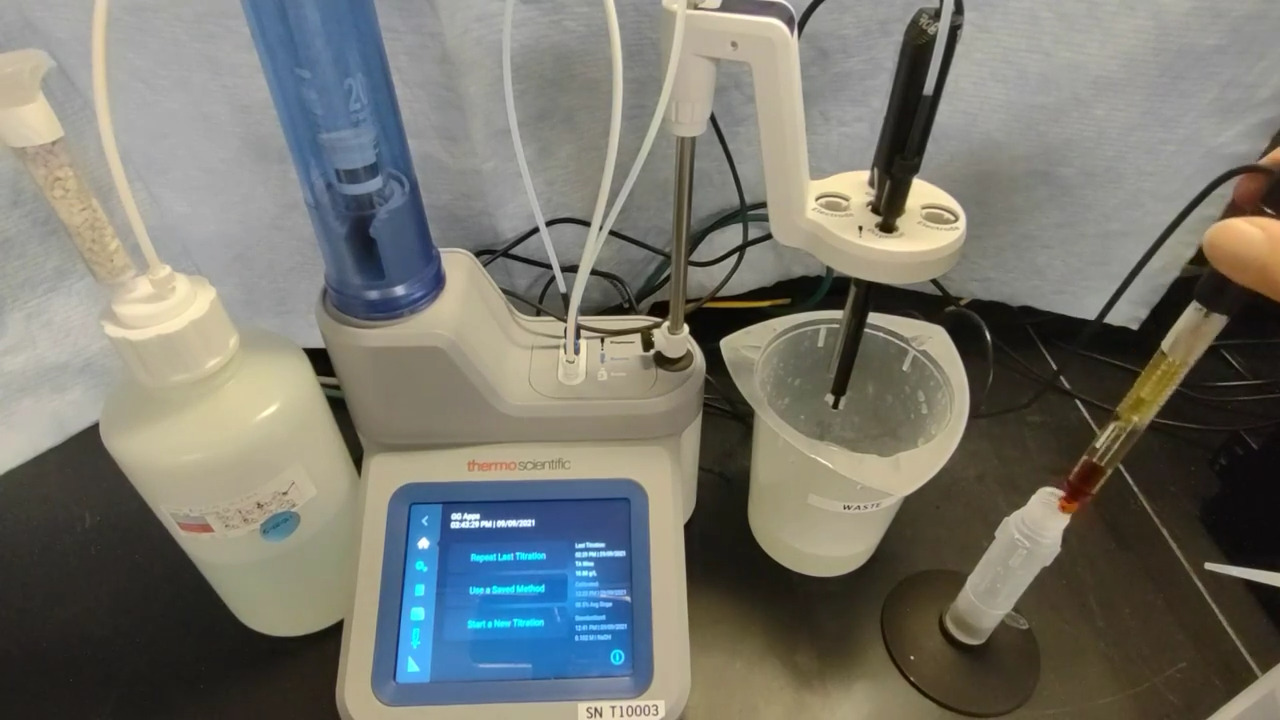
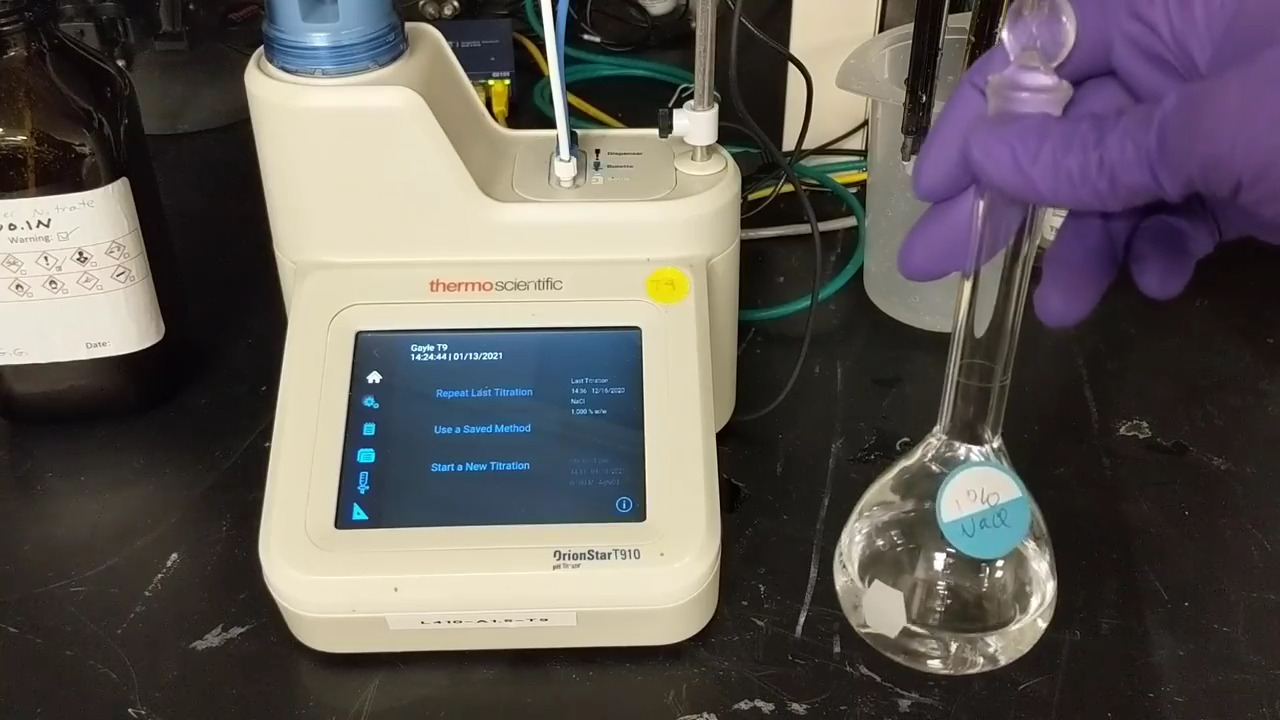
                      Learn how to select and load your saved method from the titrator home screen.  In this example, shown in the first 45 seconds of this video, we’ll load a low alkalinity method. The general procedure is the same for any saved titration.

                      Video Player is loading.
                      Current Time 0:00
                      Duration 3:15
                      Loaded: 5.04%
                      Stream Type LIVE
                      Remaining Time 3:15
                       
                      1x
                        • Chapters
                        • descriptions off, selected
                        • captions off, selected
                        • en (Main), selected

                        Step 4: Titration pre-check screen visual

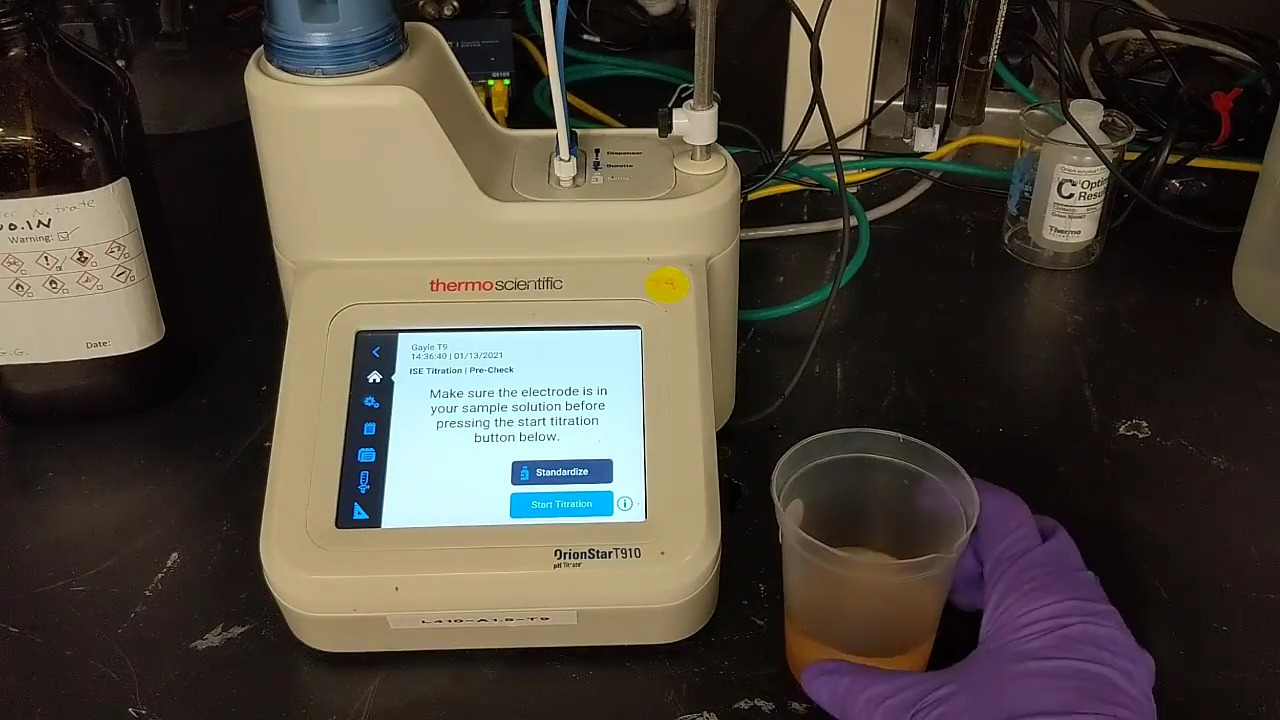
                        Once the method is loaded, choose your option from the Titration pre-check screen. To begin titrating, choose “Start Titration”.

                        Step-4-Titration-pre-check-needs work-image
                        If preferred, read instructions here
                        Titration pre-check

                        The Titration Pre-Check screen shows up to four options, depending on your method. Only the options that apply to your saved method will be displayed.

                        To proceed straight to the titration, choose “Start Titration”.

                        • To calibrate a pH electrode (for preset pH endpoint titrations only), choose “Calibrate”.
                        • To standardize the titrant, choose “Standardize”.
                        • To titrate a blank, choose “Run a Blank”.

                        If your method does not call for standardization, blanks, or a calibration, only the “Start Titration” option will be displayed. Refer to the Orion Star T900 user manual for details.

                        Step 5: Sample prep

                        Sample preparation may be as simple as pouring a measured volume of sample into a beaker. Some samples may require the addition of reagent grade water and/or weighing the sample instead.


                        Video Player is loading.
                        Current Time 0:00
                        Duration 3:00
                        Loaded: 5.48%
                        Stream Type LIVE
                        Remaining Time 3:00
                         
                        1x
                          • Chapters
                          • descriptions off, selected
                          • captions off, selected
                          • en (Main), selected

                          Step 6: Titrate a check standard (optional)

                          It can be useful to start the day's titrating a check standard to verify that titration is running as expected.

                          Video Player is loading.
                          Current Time 0:00
                          Duration 3:33
                          Loaded: 4.64%
                          Stream Type LIVE
                          Remaining Time 3:33
                           
                          1x
                            • Chapters
                            • descriptions off, selected
                            • captions off, selected
                            • en (Main), selected

                            Step 7: Sample analysis — single cycle

                            In many cases, one titration per sample is sufficient to meet testing requirements. Watch this video to see an example of titrating a single cycle of a food sample. 


                            Video Player is loading.
                            Current Time 0:00
                            Duration 3:20
                            Loaded: 4.94%
                            Stream Type LIVE
                            Remaining Time 3:20
                             
                            1x
                              • Chapters
                              • descriptions off, selected
                              • captions off, selected
                              • en (Main), selected

                              Step 8: Run replicates (optional)

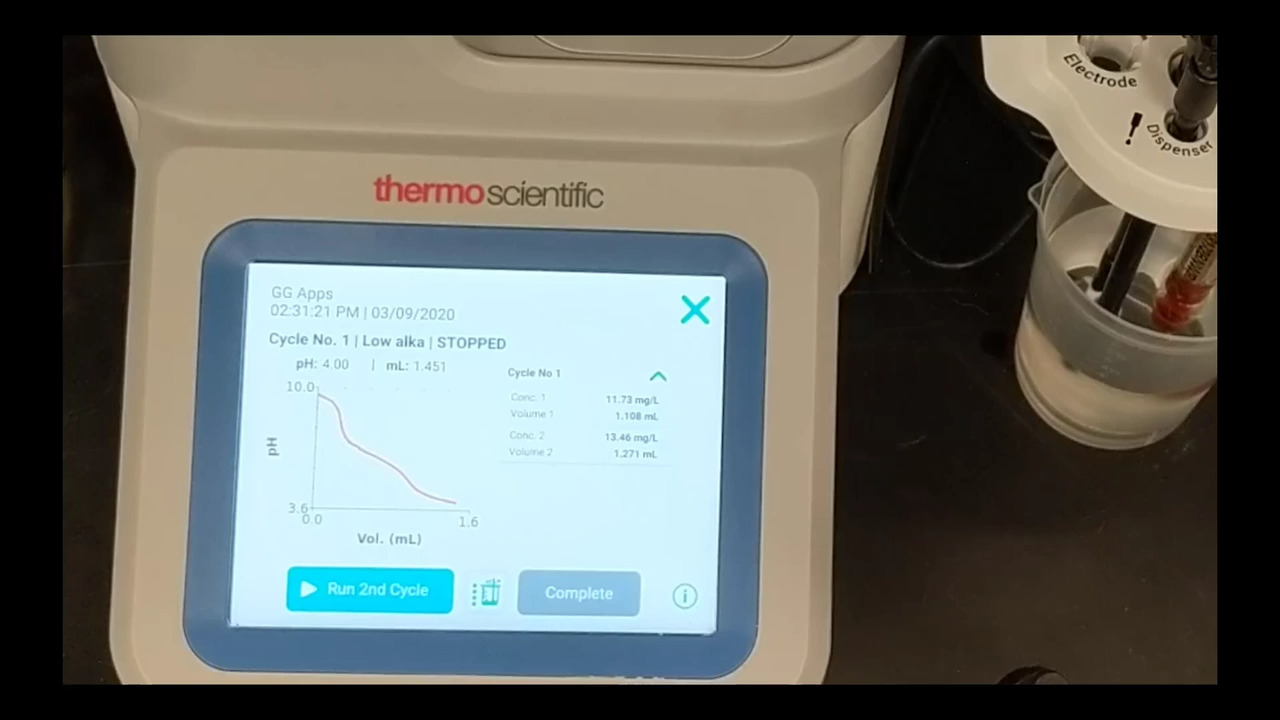
                              In some cases, it will be desirable to repeat the titration two to five times to increase the accuracy and confidence in the results. To see an example of running multiple titration replicates on one sample, see this video.

                              Video Player is loading.
                              Current Time 0:00
                              Duration 3:06
                              Loaded: 5.28%
                              Stream Type LIVE
                              Remaining Time 3:06
                               
                              1x
                                • Chapters
                                • descriptions off, selected
                                • captions off, selected
                                • en (Main), selected
                                If preferred, read instructions here
                                Replicating a titration

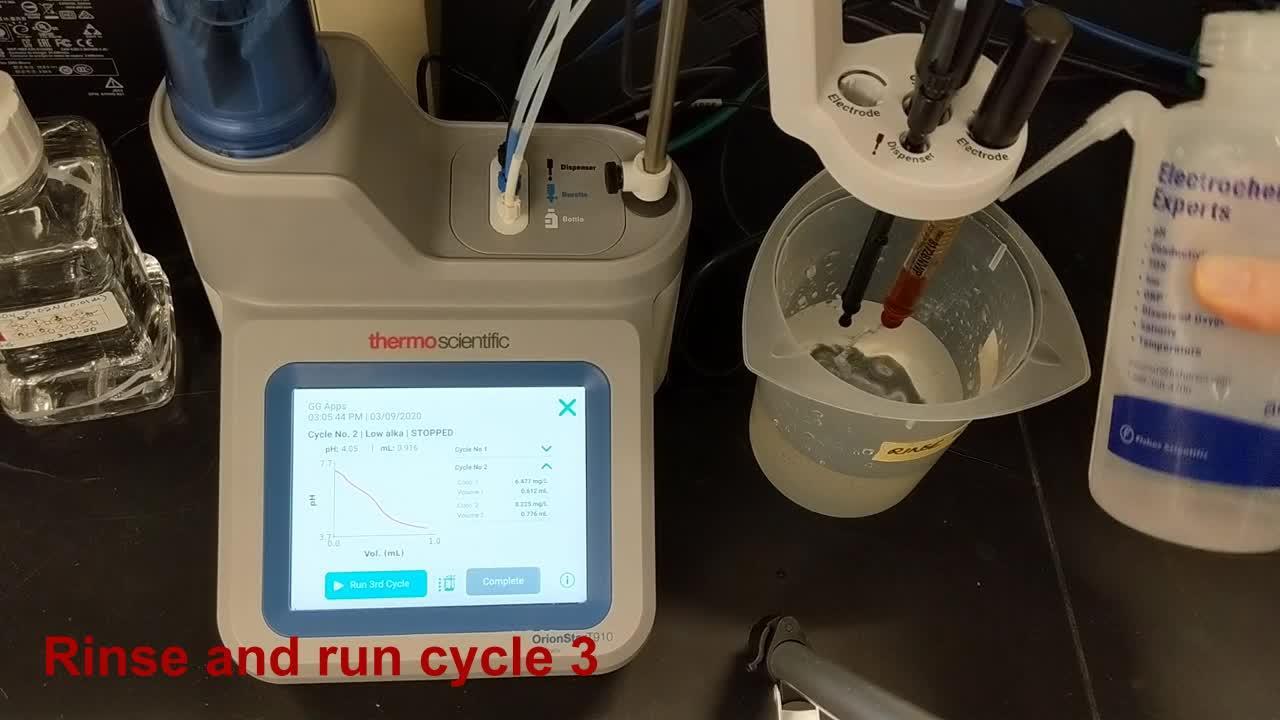
                                Press the “Run # Cycle” to perform another titration on a new aliquot (portion) of the same sample or press the “Complete” button to save and end the analysis.

                                Note: If the “Run # Cycle” button is selected, the titrator will immediately start dispensing titrant and taking readings, so the electrode, stirrer probe and dispenser probe must be in the next sample beaker before pressing this button. 

                                If the “Run # Cycle” button is selected, the titrator will repeat the same titration on the next aliquot of sample. Continue to select until the desired number of replicates are titrated, then select “Complete".

                                Step 9: Cleaning and storage

                                Depending on the type of samples tested, cleaning may be recommended on a daily, weekly, or as needed basis. Watch this video for an example of cleaning and storage after salt testing.

                                For pH cleaning and maintenance, see these videos:

                                Video Player is loading.
                                Current Time 0:00
                                Duration 4:19
                                Loaded: 3.82%
                                Stream Type LIVE
                                Remaining Time 4:19
                                 
                                1x
                                  • Chapters
                                  • descriptions off, selected
                                  • captions off, selected
                                  • en (Main), selected
                                  If preferred, read instructions here
                                  Cleaning and storage
                                  • Rinse the electrode well with RGW to remove all traces of the last titration.
                                  • Cover the fill hole and store the electrode in the storage solution recommended in the application note.
                                  • Rinse the titrant dispenser, stirrer, and ATC probe (if present) to remove all traces of the last titration.
                                  • In some cases, it may be advisable to clean equipment with a lab wipe, then rinse or briefly immerse the electrode, dispenser, stirrer, and ATC probe in 1% laboratory detergent to remove sticky or oily samples.  Then rinse thoroughly and store as directed.
                                  • If the electrode performance has become slow or dirty, perform optional maintenance as directed in the “Titrator and electrode care” section of the application note.

                                  Regular users of the Orion Star T900 Series Automated Titrator will benefit from learning these maintenance and advanced features of the titrator.

                                  Changing your titrant

                                  When changing from one titrant to another, follow this procedure to preserve the integrity of the titrant and ensure there is no cross-contamination from the previous titrant or the rinse water.

                                  Video Player is loading.
                                  Current Time 0:00
                                  Duration 3:42
                                  Loaded: 4.45%
                                  Stream Type LIVE
                                  Remaining Time 3:42
                                   
                                  1x
                                    • Chapters
                                    • descriptions off, selected
                                    • captions off, selected
                                    • en (Main), selected
                                    If preferred, review guidance for changing your titrant here

                                    When changing titrants, use the following procedure as a starting point and modifying depending on your requirements and the compatibility of existing and new titrants. 

                                    1. Disconnect the bottle tubing from the titrant bottle and leave the tubing disconnected and open to air.
                                      1. Ensure the tubing is in a clean area, away from dirt or dust that may clog the tubing.
                                    2. Perform 3 rinse cycles to remove the first titrant and flush the burette, tubing and dispenser with air.
                                    3. Connect the bottle tubing to GL38 bottle cap and plastic bottle, or the preferred bottle, filled with deionized water.
                                    4. Perform 3 rinse cycles to flush the burette, tubing and dispenser with deionized water.
                                    5. Disconnect the bottle tubing from the titrant bottle and leave the tubing disconnected and open to air.
                                    6. Perform 3 rinse cycles to flush the burette, tubing and dispenser with air.
                                    7. Remove the burette from the titrator, in an appropriate location tip the burette upside down and gently shake as much of the remaining water out of the burette as possible and then reinstall the burette.
                                    8. Connect the bottle tubing to GL38 bottle cap and plastic bottle, or the preferred bottle, filled with the new titrant.
                                    9. Perform 3-5 rinse cycles to flush the burette, tubing, and dispenser with the new titrant.

                                    Editing a method

                                    Any saved method is easy to edit. Access the Methods screen from the menu on the left and choose the pencil icon to review and edit the method. Follow along with this video to view and/or edit a method in the titrator.

                                    If preferred, read instructions here.


                                    Video Player is loading.
                                    Current Time 0:00
                                    Duration 3:30
                                    Loaded: 4.69%
                                    Stream Type LIVE
                                    Remaining Time 3:30
                                     
                                    1x
                                      • Chapters
                                      • descriptions off, selected
                                      • captions off, selected
                                      • en (Main), selected

                                      View and download data

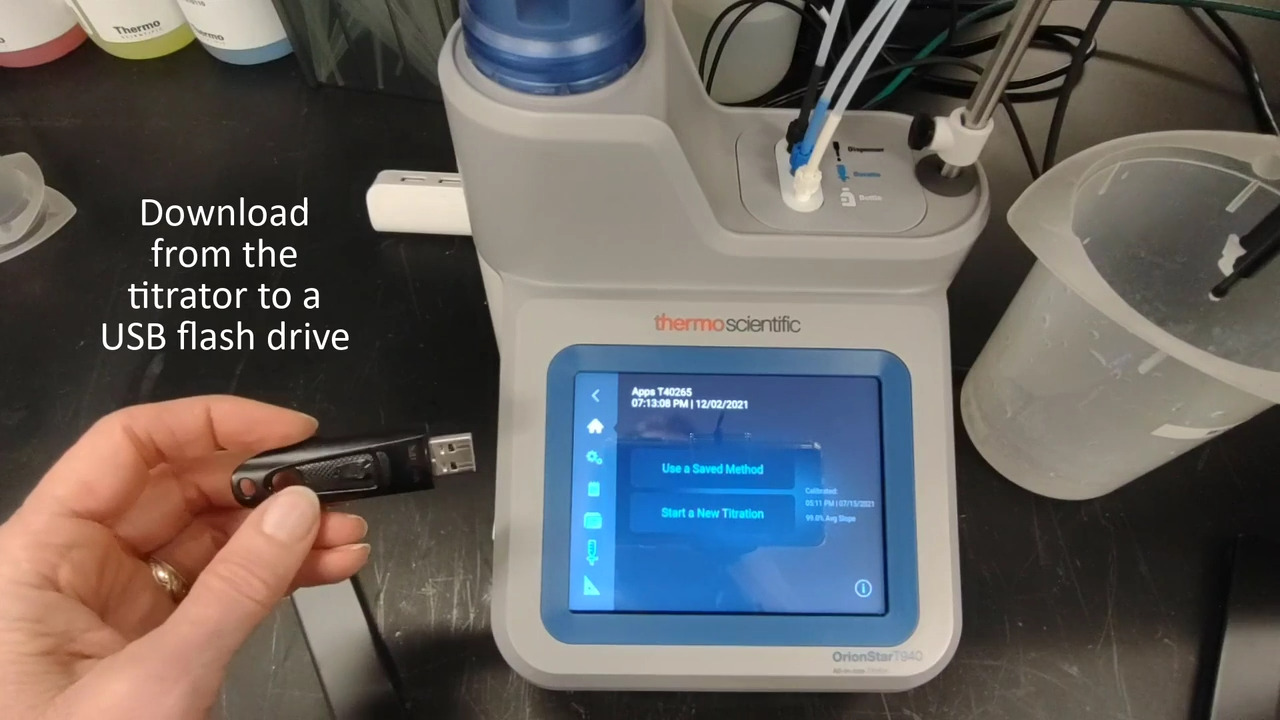
                                      Step-by-step instructions for exporting method & calibration data are shown in the video to the right, Part 1.

                                      Video Player is loading.
                                      Current Time 0:00
                                      Duration 2:58
                                      Loaded: 5.55%
                                      Stream Type LIVE
                                      Remaining Time 2:58
                                       
                                      1x
                                        • Chapters
                                        • descriptions off, selected
                                        • captions off, selected
                                        • en (Main), selected
                                        If preferred, review guidance for viewing and downloading data here
                                        View and download data

                                        The Logs screen will display the active data logs: Titration Log, Titrant Log, Calibration Log, and Direct Measure Log. Each data log will save up to 100 data sets and once full, the oldest data set will be overwritten with the newest data set.

                                        Exporting data logs

                                        Data logs can be exported to a USB flash drive as a CSV or Report (PDF) file, exported to the Orion Star T900 series computer software or printed on the Orion Star A Series Compact Printer in short or long format.

                                        Orion Instruments Service and Repair Depot

                                        Orion Instruments Service and Repair Depot

                                        Occasionally, after regular use, the Orion Star T900 Series Titrators may require calibration or more mechanical intervention. To speak to an expert about calibration or repairs, visit the Orion Instruments Service and Repair Depot.

                                        Certificates of Analysis and SDS for Orion, ROSS, AQUAfast, AquaMate, and AquaSensors products.

                                        Thermo Scientific Orion benchtop and portable meters are designed to help deliver accurate, consistent results, day after day. Boost productivity by upgrading your software today.

                                        Download the latest software updates and language packages.

                                        More Filters

                                        View all, or filter by any of the categories below to find resources that are relevant to you

                                        Style Sheet for Global Design System
                                        Style Sheet for Komodo Tabs